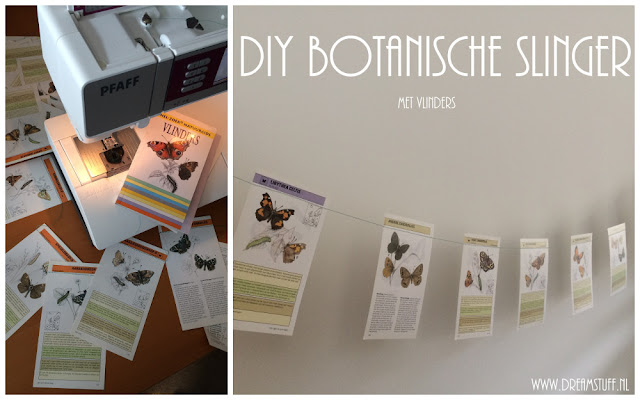
Ik was op zoek naar een "aparte" slinger. Toen liep ik tegen een echte kringloopvondst aan: een mooi botanisch boekje helemaal vol met vlinders.
Het kostte wat moeite, maar ik heb toch de kaft er netjes afgesneden en voorzichtig alle blaadjes losgemaakt. Ik liet ze op volgorde want ze zijn mooi ingedeeld naar kleur.
Zo maak je de slinger. Doe een oude "botte" naald in je naaimachine. Ik heb een jeansnaald speciaal gelabeld voor papier, die gebruik ik altijd als ik papier wil verwerken met het naaimachine. Kies een leuke draadkleur.
Naai een stukje papier vast als begin van de slinger. Dat is straks makkelijk om het begin van de draad te vinden. Handig bij het ophangen.
Naai vervolgens de bladzijden in volgorde aan de elkaar. Laat steeds eenzelfde ruimte tussen de bladzijden. Ik gebruikte de afmeting van mijn machine als referentie.
Met alle bladzijden aan elkaar heb je een mooie botanische slinger. Naai na de laatste bladzijde nog een stukje door zodat je genoeg draad hebt om de slinger op te hangen. Naai weer een stukje papier aan het einde van de draad en hecht af.
en klaar is je slinger!
---
I was looking for a "special" garland. Then I found a true thriftshop treasure: a beautiful botanical booklet filled with butterflies.
It took a lot of effort to tear such a nice booklet apart, but I cut the cover carefully off and seperated all the pages. I left them in consecution because they were nicely divided by colour.
This is how you make the garland. Put an old "blunt" needle in your sewing machine. I have a jeans needle specially labeled for paper, which I always use when I want to process paper with the sewing machine. Choose a nice thread color.
Sew a piece of paper as the beginning of the garland. That's easy to mark the beginning of the line. Handy when you put the garland somewhere. Then sew the pages in sequence to each other. Always leave the same space between the pages. I used the size of my machine as a reference. With all the pages together, you have a nice botanical garland. Sew a bit further after the last page, so you have enough thread to attach the grland somewhere. Sew again a piece of paper at the end of the thread.
And your botanical garland is ready!


